|
Dimensions
3ft H
11" L
1ft W
Supplies Needed
*Roughly 1/2" by 5.5" boards - I got the cheapy pine from the lumber store.
*Roughly 1/2" by 2" boards
*Plexiglass
*Window screening
*Mosquito net mesh
*D - Battery
*2 small hinges
*Staple Gun
*Duct Tape
*Silicone rubber sealant - caulk gun
*Drill
Note
Cutting plexiglass, use the stove for heat and a kitchen knife with a smooth, unserated edge. It sounds like a chore and smells
bad enough, but it isn't nearly as bad, labor and mistakes wise, as using a cutter. Make your lines with a sharp edge like
a razor blade against a ruler. Follow the line with the heated knife on one side, turn it over and follow it again on the
other side. Hold the piece down at both edges and give the piece you want off a gentle pull upward to see if it will easily
break off along the line. If it doesn't, turn it over and make a deeper heat-cut and try again. If you try to make it come
up too hard it might not crack off at the intended line. You have to make all straight lines, rather, if you want just a square
out of it, you have to cut all the way down for a whole piece, then make the next cut for the square off of that. Otherwise,
you can heat cut until you are all the way through the plexiglass.
Using plexiglass, pre-drill the holes you want to place the screws in with a bit large enough to allow all but the screw head.
Take care to drill the screws down just enough to make it tight, the screw head pressing down too hard will crack the plexiglass.
You can fix a crack with applying aquarium silicone glue or heating one cracked edge and re-applying it to the other. It's
fairly good about sticking back but not completely forgiving. To stop a crack from furthering, drill a very tiny hole at the
end that wants to spread and give it just a little heat or aquarium silicone glue.
I prefer the plexiglass but you can substitute other things like a thinner board or mosquito mesh netting for a clear view.
The mosquito netting has much smaller holes than window screen, where gnats/fruit flies and other smaller critters like fly
parasites and baby spiders can't get through. It's also flimsy and my cats might try to crawl on it so I'm going with the
plexiglass.
Inside Box
A)*1 of the 5.5 - 9" L
B)*2 of the 5.5 - 8" L
C)*1 of the 2" - 9.5" L
D)*Plexiglass - 10.5"L 7.5"W
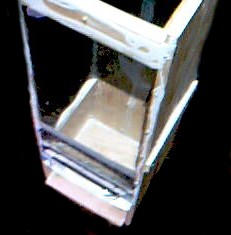
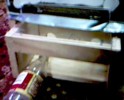
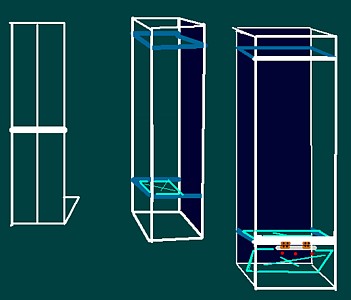
Making the Inside Box
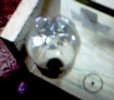
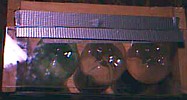
A)This is the back board where the bottles fit in. 1" from the bottom of it and 1" from the side. Drill a hole of
1.5" circumference on both sides and a third in the middle.
B)Screw the side boards to the outside of A) and set it aside until the rest of the box is built, before you're ready
to fix the trap door and put on the final plexiglass front.
C)Once you're ready, slip the box into the bottom and make sure this 2" board is long enough to fit inside the B)
boards, to keep them snug against the walls but still be able to slide out. My own dimensions are A)10.5 W C)11" W
D)Once satisfied, lay the plexiglass over the top and pre-drill the holes the screws go in.
Making the Box
A)*6 of the 5.5 boards 3' height
B)*Bottom: 11" length, 11" width - I used 2 of the 5.5 boards
C)*3 of the 2" boards - 11.5" L
D)*6 of the 2" boards - 10.10" L
D2)*1 of the 2" boards - 3" H, 10.10 L
E)*1 of the 2" boards - 8.5" L
A)Set two of the 3' boards together and screw them in place to one side of the B) bottom board. Apply one of the C) 2" boards
in the center outside or 19" from the bottom, across the two 3' boards.
Do this until you have all three sides screwed to the bottom board.
D) Apply four boards 2" from to the top on the inside
D2) Apply 3 boards approximatley 10" from the bottom on the inside, with the 3" Height one facing the front so you can screw
the face plexiglass to it and apply hinges for the trap door. Place plexiglass on the top of it with about 2" free from the
back. My dimensions for this plexiglass are 11" W, 8" L which is kind of a poop catcher and landing spot.
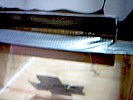
*Measure a piece of window screening to fit inside the box from inner frame and staple it in place so critters can use it
for foot holding.
E)The plexiglass for the trapdoor is roughly 8" H, 11" W. Screw this board to 11" side at the very edge and center. Apply
it to the bottom of the D) frame for hinges to be screwed in place on the E) and D) board. I duct taped a D-battery to the
other end of this plexiglass on the inside to ensure it would fall down as a trap door when I take out the inner box as well
as a little sanding for smoothness.
*Apply the smaller window screen mesh to the face of the hinges where there is a large escape area between the inner frame
and trap door. My own dimensions are 7" H - 1' 1/2" L with the duct tape just covering the top of the trap door plexiglass.
*Fit the inner bottle box for testing and making sure it slides in tightly and the trap door falls with all three plexiglass
surfaces allowing at least 2" before the back wall and the soda bottles tops themselves do not trap against the back wall.
*Apply the final plexiglass face to fit and screw in. You may want to caulk it with silicone as well as all the cracks between
wood like I did mine. Breathing holes will come from the final mosquito mesh netting and the bottom inner box where you can
just screen over an unused bottle hole.
*Set it upright and duct tape the top of the skirting window screen over the hinges to the face plexiglass and apply a final
silicone caulking between the face plexiglass and the hinge boards from the inside. It should be so escape proof Houdini flea
couldn't get out of there without taking advantage of the bottle holes.

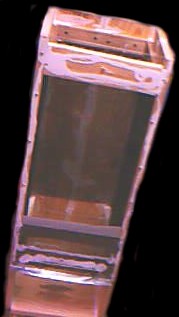
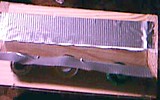
Overall look with mosquito mesh netting top
Beginning, middle and end finish
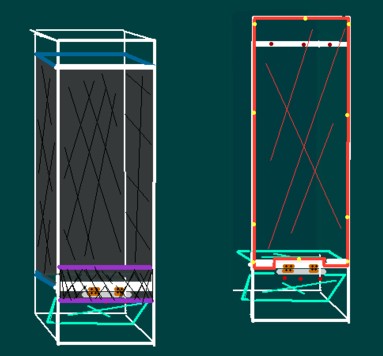
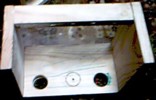
Applying both window screen meshes. Inside, and a strip with duct tape in the front. Leave the top part of it free and duct
tape it to the plexiglass face from the inside. Right pic, the final plexiglass face with a strip cut out of the bottom to
allow the hinges room with lower corners over the larger escape areas the trap door makes.
|