|
There really shouldn't be more than 1 to 2 bombina's in a 10gal tank. Fire belly toads can be kept from 3 to 4 in a 15gal
tank to around 6-7 in a 20gal. Mine are in what's more like a 15gal space, just taller, thus deeper water. Basically, one
toad per square of space that might be something more like a litre before you start pushing over crowding. Even toads like
their space and would eventually mind there being too many of them The water would also require far more maintenance just
for healthy toads than one really has to give it over a monthly period.
Essentials
One thing you're going to need for sure is a screen cover or aquarium hood lid, because bombina's are great climbers. The
more determined of the few is more than capable of shimming up the corner of a glass tank.
Fire belly toads require a semi-aquatic environment. Half land, half water. This can be done in any number of ways from building
land up using plain gravel to making a land platform on one side. Something like this large ' Herp Hotel' would be just as ideal for fire belly toads in a 10-20 gal tank given a little sphagnum moss for bedding and a coconut shell
hut as a place to hide above water or placing the hotel on top of a land structure as the hide.
Bombina's also like being able to submerge themselves in the water for long periods of time, especially if there are things
to hide around like rocks, driftwood or even a coconut shell hide. They also appreciate plants like the nymphaea zenkeri water
plant. It helps the water as much as the toads like to use it like a lily pad.
Land Fill Slant
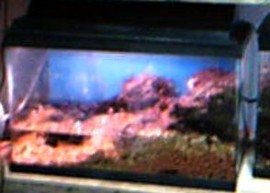
This is a blurry picture of one of my more average makes for a ten gallon tank that I placed tadpoles in to learn the hard
way to use sand with hatchlings instead of the river stone gravel.
The very first thing you do with your tank is line the bottom with aquarium active carbon. Place a coating of aquarium gravel
over that. Preferably, line something like mesh netting such as non-metalic window screen or mosquito mesh netting over the
carbon before you place the gravel, just so there isn't so much carbon getting away when you do water cleanings and stir the
gravel.
I do prefer river stone gravel over all the other types of aquarium gravel you can get because they're all coated or painted
a color which eventually chips. I don't like the idea of anything I wanted to keep in the tank ingesting that. I don't really
think there is such a thing as safe/nontoxic coloring either.
Next, find a piece of plastic such as cutting plexiglass or the black plastic false bottom that likely came with the aquarium
to fit where it will hold the land side in place as a slant upward to the land side. You can use aqarium gravel and/or a clay
ball known as LECA or Hydroton as the land fill. Hydroton floats but will remain unified, lighter than gravel, and won't float
away if gravel is placed over it. It may tint the water like the carbon but is harmless even if breathed or digested.
You can use further gravel and stones to kind of hide the sheet of plastic keeping the slant of gravel in place or you can
even use things like wide pieces of bark with the smooth side exposed. I usually place larger, weighted stones at the foot
of the slant so it won't slide away or too much gravel escape from under it if I didn't use the hydroton clay balls.
Next on the land side, place a slightly generous layer of moist, sphagnum moss. Lightly hand press it so it will be easy for
a toad to walk on and add hides.
When it's done, the land side always looks to me like it wasn't really enough. What I typically do is get two small coconut
huts and put them in both corners. Lay a strip of bark over that and add a layer of sphagnum moss over the bark to slightly
hide the face and make the bark more comfortable for a toad to be able to get up there. In this manner, they technically have
two levels of land and three places to hide.
Land Fill Wrap
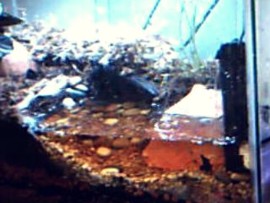
This 20gal tall version basically carries the same principle but has a 'wrap around' land to make the water look more like
a pool. I lined the sides with a mesh netting before placing gravel over it.
It's not as difficult as it might look though this one was a pain as a land fill. Large pieces of driftwood made it easier
and looked really good in the finish too. You can cheat or make it easier for yourself by carving the land portion out of
styrofoam or cork blocks and giving it a very snug fit so it won't float out of place once you add water.
False Bottom
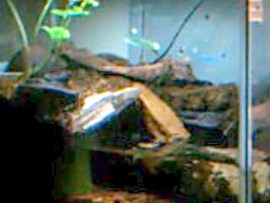
This is the same tank with a different version of the same wrap around idea. I used the black plastic false bottom that came
with this tank set up when I bought it.
I cut it in half, proportunate to the water side I wanted, heating a kitchen knife off of the stove, and set this up on top
of four regular household drinking cups. On top of the plastic I added hydroton clay balls over using gravel and then a generous
layer of sphagnum moss. The wrap around is just a two inch strip on the back side like a little pier also coated in sphagnum
moss.
They can get under the land side so the water is only so high that they can hold their heads above it under there. I can tell
they really like it because they're in the water sitting on the driftwood that reaches under the land, allot more than they're
actually on the land. It makes it more difficult to feed them though since they're only going up there to eat. Crickets are
still there just waiting. It might be different when the breeding season is over.
|